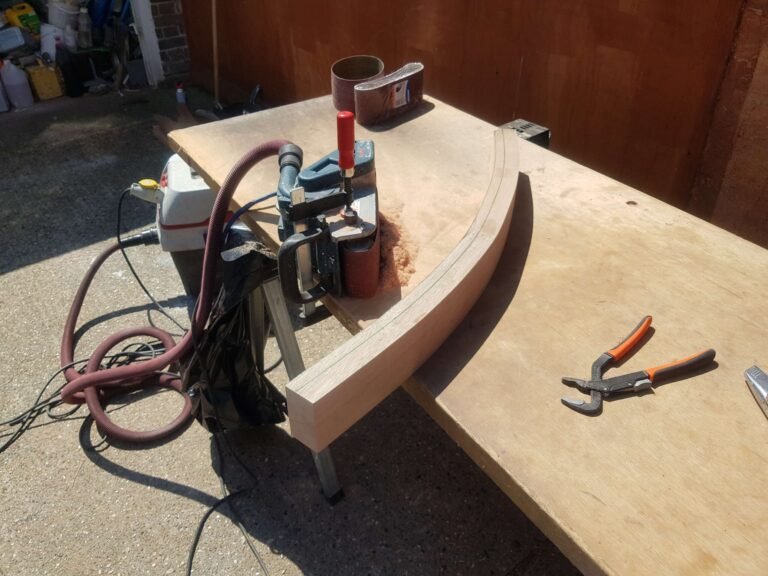
What to do: if you are onsite with no workshop tools available, you can use a belt sander by clamping it to the table to shape the curve.
Steps:
- Prepare woodblock, sometimes for bigger curves, usually has more wooden bits gluing together.
- Smoothen the woodblock to the required thickness.
- Mark the curve on the wooden block.
- Cut the curved shape line with the Jigsaw; I would recommend leaving it slightly bigger so that sanding can finish it.
- With clamps, clamp the belt sander to the work surface and sand the curve’s edges to the required size and shape.
Recommendations: practice on a sample before you start on a proper part; for curve precision, create markings on both sides of the block. After the sanding phase, flip the wood upside down so you will not go over the marking line, and this marking will help you keep the sanded edge square as close as possible. This unnecessary but depends on your requirements.
I hope it helps, and good luck with your DIY projects.
But if you are looking for Joiner to install stairs in London and surrounding areas, please visit our site; we promise to get back with a quick estimate in 24 hours.
Tonex Ltd. and is happy to help you express yourself.


Carpenter & Joiner tips. Curved wooden floor joint to the stairs gallery.

